Wednesday, October 12, 2011

Breakfast Burrito Sauce

Some successful dishes are based on reading a recipe, being inspired by an idea you wouldn't have thought of, and perhaps having a new experience. Alternatively, others are based on a random flash of a thought that illuminates a hole in your food world and makes you crave an inexplicable food experience, or even emotion, and trying to create a recipe to fill that void.


This recipe is in the later category, as a couple of weeks ago I became obsessed with the idea of making a sweet but also spicy breakfast burrito sauce. I was thinking of making a homemade breakfast burrito sauce, and all of a sudden had a very specific image come to mind of a sauce that would combine different elements from a breakfast plate (picture maple syrup mingling with the huevos racheros). I ended up starting with a smokey tomate-chipotle sauce, and adding in maple syrup, cinnamon, and fruit preserves to try achieve this savory-sweet goal.


This recipe included an ingredient that I've been curious about, but haven't used before, canned chiles chipotles en adobo. They're basically a very smokey-tasking canned chile. The flavor is definitely kind of strong, so I would use them sparingly, but I liked the flavor.

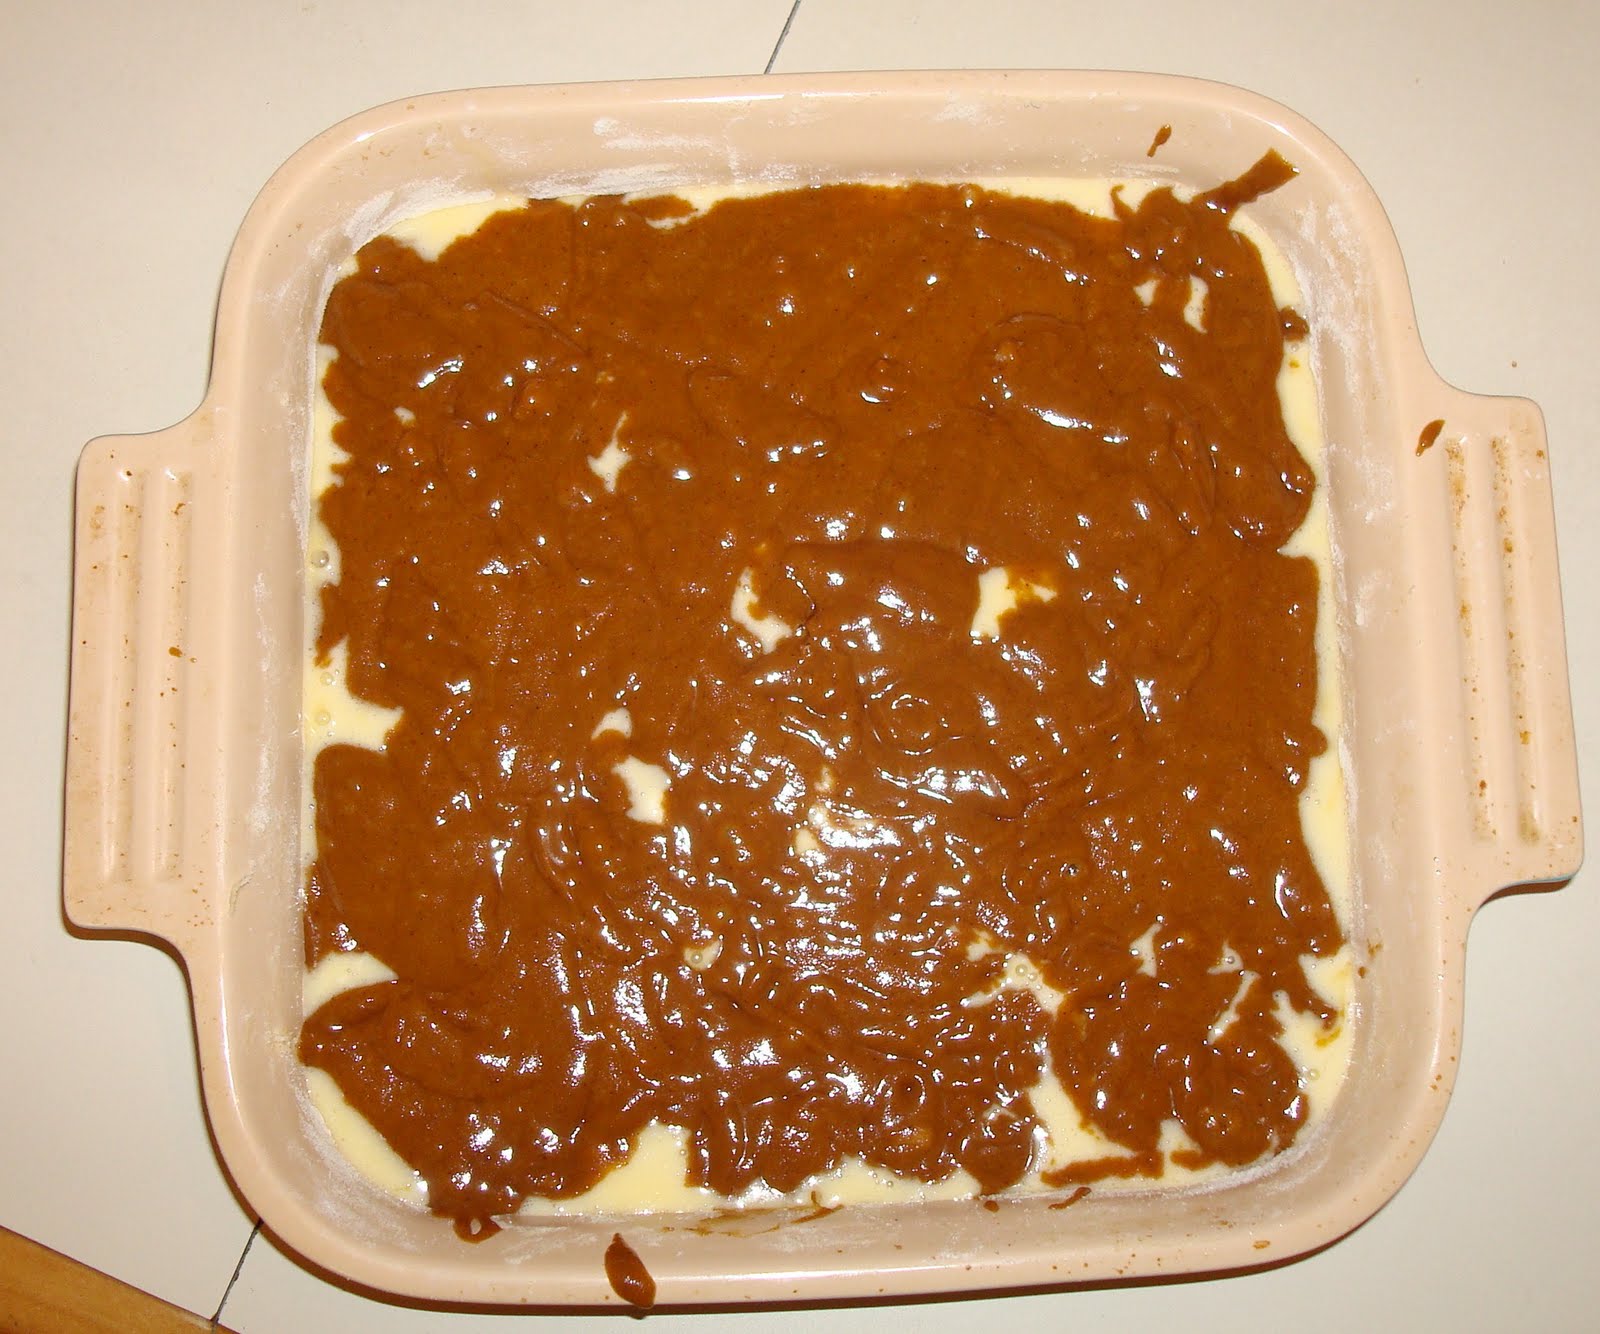
I was really happy with how this sauce turned out; this is mostly a spicy sauce, but the sweet and fruity flavors come through, making it a more complex addition than the typical sauce to whatever you put it on. Honestly, I envisioned this as a breakfast burrito sauce, but I mostly ate it with fried eggs and cheese on toast. And it was pretty amazing, especially after sitting for a few days. I think pretty much how I pictured.


Breakfast Burrito Sauce
Adapted from Rick Bayless's Essential Quick-Cooked Tomato-Chipotle Sauce

Makes about 2 cups

3 canned chiles chipotles en adobo
4-5 garlic cloves
1 1/2 lbs (4-5 medium) tomatoes 
1/2 t salt
1 T olive oil
2 T apricot preserves
1 T maple syrup
1/4 t ground cinnamon

1. On a heavy, ungreased skillet over medium heat, roast the unpeeled garlic, turning occasionally, until blackened in spots and soft, about 15 minutes. Cool, slip off the papery skins, and roughly chop. 
2. Lay the tomatoes on a baking sheet and place about 4 inches below the top of the oven with the stove set to the broiler mode. When they blister, blacken and soften on one side, about 6 minutes, turn them over and roast on the other side. Cool, then peel, collecting all the juices with the tomatoes. 
3. Scrape the tomatoes and their juices into a food processor and add the canned chiles and garlic. Pulse the food processor until the mixture is nearly a puree. 
4. Heat the oil in a medium-sized saucepan over medium-high heat. When hot enough to make a drop of the puree sizzle, add the mixture from the food processor, as well as the apricot preserves, maple syrup, and cinnamon, and stir for 5 minutes as it sears and concentrates to an earthy, thickish sauce. Lastly, add the salt. 

Keeps for at least a week in the refrigerator.

Monday, October 3, 2011

Black Bean Pumpkin Soup

It's been really cold in DC the last couple of days, and so I had a craving to make a huge pot of soup. This soup turned out really well - it's comforting and filling, and the addition of the feta adds a very crucial salty component. I also thought that this recipe was interesting because it's a recipe with pumpkin, but that doesn't have the typical spices that usually go with it, like cinnamon or nutmeg.


(By the way, I'm going to take a break from monthly theme idea that I've been doing so far this year. I have a little writer's block with idea, and also, it's fall, one the best food times of the year, so there is no shortage of recipes to try.)


And a reminder from a prior post (the most blog's most viewed/found from Google post!): the more bean recipes you like, the better, since beans are such an efficient source of energy compared to meat.  


Note: I ended up roasting pie pumpkins instead of using canned pumpkin as the recipe says. I roasted two pie pumpkins (different than carving pumpkins) by the following method: cut pumpkin in half and scoop out the seeds; either leave pumpkin cut in half, or cut in smaller pieces to decrease baking time, and lay pumpkin pieces in a large baking dish along with 1/4 inch of water; bake at 350 F for 45-60 minutes, until tender (check with a fork as baking time will depend on pumpkin size). I pureed the cooked pumpkin in a food processor. 


Black Bean Pumpkin Soup
from Gourmet

Makes about 9 cups

Three 15 1/2 ounce cans black beans (about 4 1/2 cups), rinsed and drained
1 cup drained canned tomatoes, chopped
1 1/4 cups chopped onion
1/2 cup minced shallot
4 garlic cloves minced
1 tablespoon plus 2 teaspoons ground cumin
1 teaspoon salt
1/2 teaspoon freshly ground black pepper
1 T olive oil
4 cups vegetable or chicken broth
2 16-ounce cans pumpkin puree (or about 3 cups of roasted pureed pumpkin)
3 to 4 tablespoons apple cider vinegar

Garnish: crumbled feta cheese

1. Coarsely puree beans and tomatoes in a food processor.
2. In a large soup kettle, saute the onion, shallot, garlic, cumin, salt, and pepper in the olive oil over moderate heat. Stir until the onion is softened and beginning to brown. Stir in bean and tomato puree. Then stir in broth and pumpkin, and simmer for about 25 minutes, until think enough to coat the back of a spoon.
3. Stir in vinegar and season with salt and pepper. Garnish with feta cheese.

Thursday, September 15, 2011

Brief Blog Hiatus

I'm traveling to Minnesota tomorrow for the first of two wedding weekends in a row, but I'll be back in a couple of weeks with some new posts! The season is definitely changing here in DC - it was actually chilly walking home tonight - and I'm excited to make and write up some autumnal recipes!


Saturday, September 3, 2011

Roasted Tomato - Jalapeno Salsa

July/August Theme: Homemade summer

Well, Readers, summer, and "homemade summer" here on the blog, are both coming to an end. I've tried to come up with some creative ideas for food items to make yourself over these last two months.

And while I think all of them turned out to be really interesting and are recipes that I'll continue to use, I will say this: if you decide based on this series to start making only one thing from scratch, I think it should be salsa. Because aside from all of the environmental reasons for cooking from scratch previously discussed, homemade salsa is just so much better tasting than store-bought salsa. I feel like the two should not even really be in the same category.


When I make my own salsa, I usually make a really simple tomato, onion, and cilantro salsa, but I decided to try and do something more ambitious. This recipe has pretty much the same basic ingredients, but you roast the tomatoes, garlic, and jalapenos before blending them in a food processor. This brought up a couple of new techniques for me: broiling tomatoes in the oven to roast them, and roasting unpeeled garlic along with jalapenos until they are blackened.

The result?

The roasted flavor is really good - it adds a lot of complexity to the flavor of the salsa - and I am also now questioning whether or not there is that much that smells better than garlic being roasted over a flame in its papery skin. So you don't want to miss that.


I made a double batch of this and after five days or so of eating it, mixed it with two avocados (so one avocado per recipe as below) to make a pretty amazing guacamole.

Lastly, I forgot to commemorate this at the time, but the blog was one year old as of July! The first post also happened to be a do-it-yourself recipe just like this one: homemade honey-mustard-ginger vinaigrette salad dressing.


Roasted Tomato-Jalapeno Salsa
From Rick Bayless's Mexican Kitchen: Capturing the Vibrant Flavor of a World-Class Cuisine 

Makes about 2 cups

1 pound (2 medium - large round or 6-8 plum) red, ripe tomatoes
2 large fresh jalapeno chiles
3 garlic cloves, unpeeled
salt, about 1/2 t
1/2 small or 1/3 medium white onion, finely chopped
1/3 C loosely packed chopped cilantro
1 1/2 t apple cider vinegar
juice of 1/2 lime

1. Cut the tomatoes in half, and lay on a baking sheet and place about 4 inches below a very hot broiler. Roast until blistered and blacked on one side, about 6 minutes; with a pair of tongs, flip the tomatoes and roast on the other side, about another 6 minutes.
2. While the tomatoes are roasting, roast the chiles and unpeeled garlic directly on an ungreased griddle or heavy skillet over medium heat. Turn occasionally until both chiles and garlic are blackened in spots and soft, 5-10 minutes for the chiles, and about 15 minutes for the garlic (remove the chiles from the pan once they are done). Cool, pull the stem off the chiles, and peel the papery skins from the garlic.
3. Once tomatoes are done: cool them, then peel the skins off, collecting any juices with the tomatoes.
4. In a food processor, grind the chiles (including seeds), garlic, and 1/4 teaspoon of the salt to a course paste, stopping to scrape down the sides of the bowl a couple of times. Add the tomatoes and pulse a few times until you have a course-textured puree. Transfer the salsa to a serving bowl, and stir in any reserved tomato juices.
5. Stir the finely chopped onion into the salsa, as well as the vinegar, other 1/4 teaspoon of salt, cilantro, and lime juice.

The salsa comes into its own a few hours after it's finished. Keeps in the refrigerator for at least a week.

Sunday, August 21, 2011

Jerk Chicken Marinade

July/August Theme: Homemade summer

The humidity and temperature both dropped in DC today, which, while completely welcome and meant the weather was gorgeous, also served as a reminder that summer is winding down. Which is a little sad. But if you are feeling at all similarly, I think this recipe could help-- grilled and tropical-tasting jerk chicken.


I've been meaning to make this for a few weeks and finally made it last night, and it was really good. I wanted to find an interesting marinade recipe to go along with the made-from-scratch theme. To be honest, it does take a little while to cut up all of the ingredients that make it up, but I think you can really tell the difference, in addition to all of the benefits of making something form scratch rather than buying processed/packaged marinade. The flavors are really interesting-- soy sauce, with all spice and nutmeg, thyme and lime juice. I'm mostly focusing on the marinade aspect (versus the chicken cooking), since you could use this with either grilled or baked chicken.


Since I am currently grill-less, I used a grill pan to grill the chicken. I only marinaded the chicken this for an hour since that was all I had time for, but the recipe actually says that you could marinade chicken with this for up to 12 hours, which could be interesting.


And lastly, a few photos from my summer vacation- this recipe would have tasted even better sitting out in one of these places...


Jerk Chicken Marinade
From Gourmet

3 scallions, chopped
4 large garlic cloves, chopped
1 small onion, chopped
4-5 jalapeno chiles
1/4 c fresh lime juice
2 T soy sauce
3 T olive oil
1 1/2 t salt
1 T packed brown sugar
1 T loosely packed fresh thyme leaves
2 t ground allspice
2 t freshly ground black pepper
3/4 t ground nutmeg
1/2 t ground cinnamon

Combine all ingredients in a blender and blend until smooth. Marinade chicken for at least one hour, but can also be used to marinade chicken over night, up to 12 hours, before cooking.


Tuesday, August 2, 2011

Environmental Advantages of Cooking with Non-Processed Food


Image source: http://www.slashfood.com/2011/03/24/u-s-food-industry-to-trim-packaging-waste-by-4-billion-pounds/.

Going along with July/August's theme of homemade or do-it-yourself food items that you might otherwise purchase processed, I thought I'd look into some of the environmental and related health reasons for decreasing prepackaged and preprocessed food consumption. Processing and packaging are obviously two separate things, but often go together with food choices.

While looking up the statistics mostly confirmed things that I had assumed (processed food requires more energy to produce than fresh food, since processed food re-constitutes fresh food, which takes energy), I was surprised by the portion of energy required for this stage, and it was good to remember how many stages there are to packaging and selling of processed food. For instance, think of the energy required to retail packaged food, which is completely separate from its production.

Advantages of cooking with non-processed foods:

Less energy used. Eating non-processed or packaged food can decrease food's carbon footprint because substantial energy is required to transform fresh food to the processed food found in a grocery store.
  • According to the Earth Institute, "Growing food accounts for only one fifth of [the US food system's annual energy consumption]. The other four fifths is used to move, process, package, sell, and store food after it leaves the farm....While 21 percent of overall food system energy is used in agricultural production, another 14 percent goes to food transport, 16 percent to processing, 7 percent to packaging, 4 percent to food retailing, 7 percent to restaurants and caterers, and 32 percent to refrigeration and preparation." (As a side note, this is also a reason to each local food, as eating fresh food doesn't necessarily mean that less energy was spent on food transport.)
  • Often the energy in the food is less than that required to produce it: "Processing breakfast cereals requires 7,125 kilocalories per pound—easily five times as much energy as is contained in the cereal itself" (from same Earth Institute article).
Decrease in chemical exposure. Due to the chemicals currently used in food packaging, the packaging itself can lead to environmental and animal and human health problems.
  • A 2011 study found that food packaging (i.e. cans, wrappers, and polycarbonate bottles) is a substantial source of BPA exposure, which has been found to cause endocrine disruption in animals and in some human studies.
  • As the Institute for Agriculture and Trade Policy explains, in addition to promoting packing materials without BPA, BPA exposure from food packaging can be lessened by cutting consumption of prepackaged foods and cooking form fresh ingredients.
  • The IATP also shows an image from the article of the top 10 canned foods known to leach the most BPA, which I found slightly unnerving as coconut milk, the canned item I probably buy the most of, is at the top of the list.
So try to use non-packaged or non-processed foods whenever you can! More recipes coming on this theme during August.

Wednesday, July 27, 2011

Pasta Salad with Homemade Caramelized Leek & Goat Cheese Dressing

July/August Theme: Homemade summer

Since July is almost over, and really, in DC July and August tend to blend together into one hazy heat-filled period of time, I'm going to combine July and August's theme into one. True to form, it has indeed been heat-filled here lately, which is when I start to fixate on dishes that are served cold, a favorite being pasta salad.


The classic versions I think of are made with either mayonnaise or Italian dressing along with cubes of cheddar cheese and broccoli. Usually, when I make pasta salad, I go in a completely different direction from those. But I thought that it would be interesting to try to make something in the spirit of those pasta salads, but with a homemade dressing made of more unique ingredients and sans mayonnaise.

The cool thing about this recipe is that I started with the base of the dressing with the pasta, and then added in the other elements somewhat experimentally based on what I had. So you could do a lot of different things with it if you changed which vegetables/fruit/protein you added to it. Other ideas I had included asparagus, zucchini, and almonds.

The dressing might sound complicated, but is very easy as long as you are willing to caramelize the leeks. The flavor that comes out is very interesting and somewhat rich, which then plays off of the vegetables, etc well.


Working on this dressing got be thinking about other summer staples that are often store-bought, but that are easy to make from scratch- salsa and meat marinade in particular came to mind. So the theme for July and August will be summer recipes that you might usually use a store-bought ingredient (in this case, the dressing for the pasta salad) with an easy homemade version. I'll also be doing a post about the topic of homemade versus processed food products in general, looking at some of the advantages to making things yourself instead of buying them. Happy summer!


Pasta Salad with Homemade Caramelized Leek & Goat Cheese Dressing

Makes a large batch, so consider halving if only want a few servings

1 T olive oil
touch of salt
6-7 radishes, sliced very thin
1 bunch broccolini or broccoli(about 2 C chopped)
4 C dry pasta, such as macaroni
1 15-ounce can chick peas
2 medium Granny Smith apples

Dressing
Juice of one lemon
1 t salt
1/2 t ground black pepper
3 T olive oil
1.5 T apple cider vinegar
1/2 T honey
4 ounces goat cheese, softened
2 medium to large leeks (about 2 C chopped), caramelized

1. Remove dark green tops and root from bottom of leeks. To wash, halve leeks lengthwise and thinly slice crosswise in large bowl of cold water. Wash leeks well and lift from water into large colander.
2. Heat 1 T of olive oil in large frying pan over medium heat, add leeks and stir to coat. Sprinkle with salt.
3. Turn to low and cook for 20-30 minutes until brown and caramelized.
4. In meantime, boil large pot of water, about 4 quarts with salt added. When water is boiling, add pasta. Cook until al dente, about 8-10 minutes.
5. Slice radishes into very thin slices. Chop apples into small cubes.
7. Once leeks are done, chop brocollini or broccoli into small pieces, and saute lightly in same pan as leeks were cooked in. Cook only until lightly sauteed but still crisp.
8. Set pasta, fruit and vegetables aside.
9. To make dressing, combine caramelized leeks, lemon juice, salt, pepper, olive oil, vinegar, honey, and softened goat cheese in food processor, and combine until ingredients are finely ground.
10. Combine dressing with pasta. Once pasta is room temperature, come both with fruit, vegetables and chick peas. Put in refrigerator until cold. Serve chilled.

Tuesday, June 28, 2011

Thai Stuffed Peppers

June Theme: International Food Issues & International Recipes


While I have to admit I can't completely vouch for the Thai authenticness of this recipe, I was drawn to it because of the mix of some interesting flavors for a stuffed peppers recipe, which I usually think of as being an Italian or all-American dish.


But the stuffed peppers have a completely different flavor in this case because of the cilantro, peanuts, and Thai flavors. I ate this with rice when I made it, because it does end up tasting like a lot of meat at once (so it could be interesting to add other vegetables to the pepper stuffing). Don't skip the fresh lime juice, which makes them taste really fresh!


Thai Stuffed Peppers

1 lb ground turkey
2 T Hoisin sauce
2 T soy sauce
1/2 C chopped peanuts
1 shallot, minced
3 cloves garlic, minced
1 T fish sauce
1/4 t ground back pepper
1/2 C chopped fresh cilantro
1 T ground or fresh ginger
5-6 large sweet peppers (I used sweet cubanelle peppers)
Juice of one lime

1. Combine the turkey, peanuts, shallot, garlic, fish sauce, black pepper, soy sauce, Hoisin sauce, lime juice, and cilantro in a mixing bowl.
2. Cut the peppers in half lengthwise. Remove the seeds and membranes.
3. Stuff the turkey mixture into the pepper halves, mounding the mixture slightly.
4. Bake at 350 degrees F, uncovered, in a lightly-greased pan for 35-40 minutes, until meat is cooked through.

Adapted from Crossroads Cooking

Tuesday, May 31, 2011

International Food Crises caused by Spikes in Food Prices

June Theme: International Food Issues & International Recipes

But a brief aside before getting to the actual topic...

So, first of all, my one-month hiatus from the blog accidentally turned into a three-month hiatus. Instead of trying to figure how that's possible, and how that much time went by, I'm going to focus on the fact that I'm excited to get back to the blog, and the whole monthly theme plan that I have been working on.


In the time since I last posted, I went on a month-long work trip to Indonesia, and one tiny blog-related thing came full circle: the image at the top of the blog is of rice paddies, and while I was in Indonesia I went on a hike outside of Jakarta through some amazingly beautiful actual rice paddies.


Even though I've been back for a few months, I've still been thinking a lot about my trip, and so it seemed like a good time to do a post on international food policy issues. And then with the next couple of posts, I'll post some internationally-inspired recipes!

And now to the topic at-hand: food prices.

Maybe you remember the news coverage on the global food crisis in 2007-2008; that was the first time I remember learning about some of the complicated causes of escalating food prices and the potential impacts.

That particular food crisis was blamed on factors including rising energy costs and an increase in demand for food brought on by a growth in the middle class in China and India. In addition, demand for biofuels in developed countries was also blamed, including by the World Bank; since biofuel production requires food sources as an input, theoretically their production competes with food resources and increases prices through an increase in demand.

Why does this matter? Even though households in the US are obviously also affected by increases in food prices, because households in developing countries spend a higher portion of their income on food, they are adversely affected. According to a 2008 NYT article, "Even the poorest fifth of households in the United States spend only 16 percent of their budget on food. In many other countries, it is less of a given. Nigerian families spend 73 percent of their budgets to eat, Vietnamese 65 percent, Indonesians half."

In the food crisis of 2007-2008, these stressors affected not only people's access to food, but led to social unrest; increases in food prices lead to riots in several countries, including Haiti and Egypt.

And now, upon observing high food prices in 2011, many have predicted that another food crisis is on the horizon. An article by Lester Brown in Foreign Policy names similar causes for this crisis as the one in 2007-2008, but adds that climate change-induced effects such as soil erosion, which shrinks production.

What can be done? Obviously this is an incredibly complicated issue, but suggested policy options to deal with this issue include convincing the US and EU to lesson subsidies and tax benefits for biofuel production, and programs to increase agricultural productivity in developing countries so as to decrease prices (see NYT 2008 article). In addition, it seems that legislation targeting climate change should be a long-term policy goal, with development programs that work on the effects of climate change on agriculture helping in the short term.

This policy topic is as bit harder to tie directly back to "your own table" (other than maybe not using biofuels and trying to limit climate change). For me, it's more of a reminder to think of ways to affect and change developed country agriculture policy, including biofuel policy, since it seems that this is one factor among the many complicated ones that combine to cause food crisis in developing countries.

Sunday, February 27, 2011

Brief Blog Hiatus

I am out of the country for work for most of March, so the blog will be on a brief hiatus! Back in April with more posts.

Garlic Cloves Confit

February Theme: Indulgence.


I'm packing to go on a work trip, so this will be short! And simple: garlic slow-cooked in olive oil-- and that is the whole recipe. And yet, this dish is really something in-and-of itself. Plus, it's very indulgent: it doesn't even really fit into any one meal, so you basically need to let yourself have an appetizer or snack of this in between your normal meals. Even though the flavor relies on just garlic, because of the way it's prepared, the flavor is unique. The garlic is slow-cooked to the point of being as spreadable as butter, and the flavor is earthy and rich. It's great alone on baguette, or added to a sandwich.


Garlic Cloves Confit

1/2 C peeled garlic cloves
About 1/2 C olive oil

Put garlic into a small heavy saucepan and add enough olive oil to cover garlic. Bring just to a simmer, reduce heat, and cook at a bare simmer until garlic is tender, about 25 minutes. Let garlic cool in oil.

The garlic keeps, in the oil, for up for two weeks, covered and refrigerated.

Monday, February 14, 2011

Gingerbread with Cheesecake Layer

February Theme: Indulgence.


I'm taking a little break from the policy theme (which I attempt to connect my recipes to, however tangentially) for the month of February to focus on a very important quality of food: richness.


I love gingerbread, and this recipe allows you to eat it in soft, brownie-esqe form. To up the richness ante, these have a layer of cream cheese in the middle, which actually ends up seeming very crucial as it counter-balances the spiciness of the gingerbread. Delicious.


One note: the recipe calls for very hot water of 190 degrees F; I didn't take the temperature of the water I used, but microwaved it to about the temperature that you would for tea.

Gingerbread with Cheesecake Layer

Serves 6 to 8
Slightly adapted from The Splendid Table

Cheesecake Mixture
1 egg
4 ounces cream cheese
1/4 C sugar
2 t lemon juice
1/2 t vanilla extract
Gingerbread
2 C less 2 T unbleached all-purpose flour
1 t baking soda
Generous 1/2 t salt
1 T ground ginger
3/4 t ground cinnamon
1/4 t ground cloves
1/4 t cardamom
6 T unsalted butter, melted
3/4 C dark molasses
3/4 C very hot water (190 degrees F)
1/3 C packed dark brown sugar
1 large egg

1. Before starting the gingerbread, make the cheese mixture. Beat together the egg, cream cheese, sugar, lemon juice, and vanilla. Set aside.

2. Preheat the oven to 350°F. Butter and flour an 8-inch square light-colored metal or ceramic baking pan.

3. Make the gingerbread. In a medium bowl, whisk together the flour, baking soda, salt, ginger, cinnamon, cloves, and cardamom. In a large mixing bowl, beat together the butter, molasses, hot water, and brown sugar. When the mixture is almost frothy, beat in the egg, and gradually add the flour blend. Stir until thoroughly blended, but no more.

4. Pour half of the gingerbread batter into the pan. Drop spoonfuls of the cheese mixture over the batter. Then cover with the remaining gingerbread mix. Bake for 35 minutes, or until a tester inserted in the center of the cake comes out clean.

5. For a moist gingerbread, cool it in the pan on a wire rack. For a drier consistency, cool the gingerbread in the pan for 10 minutes; then turn it out of the pan and set it on the rack to cool.

Tuesday, February 1, 2011

Slow-Cooked White Bean Gratin

[Belated] January Theme: Making Beans, an Efficient Energy Source, Taste Richer Than They Really Are


Upon ringing in 2011 I had lots of new thoughts about the blog; about new recipes to try, and about how to integrate the recipes better with the food policy ideas... and then somehow the whole month of January went by. Mostly somehow sucked up by work. But, moving on. What I want to try to do is have changing umbrella themes or topics that the recipes fall under, and change it month to month.

So even though January is actually over as of today, I DID actually make something to fit into the new plan this month, I'm just super late in posting it, and so am going to pretend it's not quite February yet.


My idea for January was to do some really simple recipes to go along with the clean-slate feeling of a new year, and also tie this back to a past post about the environmental effects of eating meat by showing some satisfying, interesting recipes with one of the most efficient forms of protein that you can use: beans. Plus, beans seem like a good ingredient to use at the start of a new year, when lots of people are resolving to spend less money, because they are so cheap, but can be really good when played-up.

But beans can seem kind of boring. I tried to get around that with this recipe, which requires slow-cooking the beans to make them tender and more flavorful than usual, and then putting them in a gratin, which makes the white beans taste surprisingly rich, and like a dish in and of themselves.


Slow-Cooked White Bean Gratin
Adapted from Gourmet

1 pound (2.5 C) dried white beans
4 cups onions, chopped
5-6 cloves garlic, peeled
2-3 sprigs rosemary
10 C water
1 bay leaf
1 T salt
2 carrots, diced
1 T olive oil
3 t white wine vinegar
1 T garlic cloves, minced
salt and pepper to season
1 C bread crumbs (I used whole wheat)
1/2 C Parmesan cheese, shredded
1 C Gruyere cheese, grated

1. Put beans, water, rosemary, bay leaf, and garlic in 5-quart heavy pot. Cover and slowly bring to a simmer over low heat, which will take about one hour. Then simmer beans until tender but not mushy, about 35-45 minutes. Remove from heat and let cool, covered, for about 15 minutes.
2. Drain almost all cooking liquid from beans but while reserving cooking liquid. Discard rosemary sprigs and bay leaf and mash any intact garlic cloves into beans. Add salt.
3. In a saute pan, use 1 T olive oil and saute chopped onions, garlic, and carrots for 10-15 minutes, until tender.
4. Combine 1 C of cooked beans, 1.5 C of left-over cooking liquid, 1 T olive oil, white wine vinegar, and salt to taste in a blender or food processor and puree. In large bowl, stir puree into remaining whole beans, and then add in onions, garlic, and carrot mixture. Pour mixture into 3-quart baking dish or other shallow baking dish.
5. In small bowl, mix together bread crumbs, Gruyere, and Parmesan, and sprinkle over gratin. Bake gratin at 425 degrees F until top is browned, about 20 minutes.