Showing posts with label summer. Show all posts

Monday, July 3, 2017

S'mores Bark

If you're like me and having an urban Fourth of July weekend (which is lovely in its own right), here's a small way to bring a bit of the beach and campfires to your weekend or BBQ plans. I made these for the first time last year pretty randomly, and they are SO easy. You're basically just melting the ingredients of a s'more into an easily-transportable bark. S'mores have such an unmistakable flavor that they're an immediate bite of summer. 

Enjoy and Happy Fourth!


S'mores Bark 

Makes a 9x9 square
Prep time: About 20 min. 
Refrigeration time: About 60 min. 

3 4.25 ounce chocolate bars (e.g. large Hershey's bars), either milk or dark**
3/4 C mini marshmallows
3/4 C graham crackers broken into small pieces 

1. Line a 9x9 pan with parchment paper; paper will probably not lie down flat yet, which is fine. 
2. Crumble the graham crackers into small pieces, but not letting them get completely powdery. 
3. Break the chocolate into small pieces in a glass bowl, and microwave for two to three minutes, until melted, stirring half-way through. 
4. Once chocolate is melted, add in about a half cup of each the mini marshmallows and graham crackers (leaving the rest for the top) into the glass bowl, and stir until everything is coated with chocolate. 
5. Pour the mixture into the parchment paper-lined pan, and smooth out with a spatula so that mixture goes to edges of pan. Hold down the parchment paper in corners so that the liquid spreads to edges of pan. 
6. Pour remaining marshmallows and graham crackers over top of bark. 
7. Refrigerate for about an hour, until chocolate is completely cooled and solid. 
8. Using a large knife, chop bark into equally-sized squares. 

**I like a mix of milk and dark, and used two dark and one milk this time


Wednesday, September 14, 2016

Cucumber Rickey

Though it's mid-September, it still feels like summer in DC (it was 97 degrees out last weekend!), and we technically all still have another week before autumn officially starts. 

I made this cocktail a few weeks ago with mint that I'm growing in my small-but-mighty terrace garden, and it was really refreshing and different. I personally love ginger beer, and this is a great way to incorporate some fresh elements into a cocktail.

So if you are still craving a bit of summer before fall officially starts, try these out!


Cucumber Rickey 
Adapted from shake 
Makes two

4 shots of vodka
1 handful of fresh mint leaves (plus a few for garnish)
6 slices of cucumber (plus 2 for garnish)
1 T fresh lime juice
1 can ginger beer
Ice cubes

1. Add the mint leaves, cucumber, and lime juice to a cocktail shaker.
2. Using a muddler, muddle the ingredients in the bottom of the shaker until thoroughly crushed.
3. Add the vodka, and then ice to above the level of the liquid mixture, and shake vigorously for 10 seconds.
4. Strain mixture into pint glasses containing ice cubes, top with about 1/2 can of ginger beer, and garnish with remaining cucumber slices and mint leaves.


Wednesday, June 19, 2013

Chicken & Corn Tacos with Quick-Pickled Radishes, and "Meat in a Supporting Role"


I read this NY Times Mark Bittman article, "Meals with Meat in a Supporting Role," a few months ago and liked the "supporting role" for meat concept. It's basically a reminder that, even if you're not a vegetarian, changing your attitude about meat, and how much you eat of it, can have positive effects and be worth the extra effort. For instance, you'll decrease your impact on the environment since you'll be eating less meat per day.


I like to think about this concept as finding ways to stretch meat farther. Although other recipes would take that concept even farther, I think this chicken and corn tacos recipe is a good example of how to spread meat a little thinner by adding more vegetables. You make quite a few more tacos by adding corn in a substantial quantity, so the meat plays less of a central role.


The chicken and corn preparation is pretty standard, but what really takes these tacos to the next level are the additions. I decided to get even a bit more ambitious with the vegetables included by adding pickled radishes, and made a really simple quick recipe (they're basically instant - you can refrigerate them if you have time, but it doesn't have to be for long). I'd been wondering what it would be like to add a pickled vegetable, like you have in Vietnamese dishes, as an addition. If you like sour or vinegar-flavored things, they're delicious and super, super easy. They make the tacos taste punchier, and play off the cheese and avocado nicely.


Everything is rounded out by a salty cheese (see note below on the type), cilantro, and creamy avocado, so don't skip the toppings!


Chicken and Corn Tacos with Pickled Radishes
adapted from smitten kitchen and this pickled radish recipe
Makes about 8 tacos

Chicken and corn tacos
4 ears corn
2 T sriracha sauce
2 T apple cider or white vinegar
1/2 teaspoon salt
1/2 t crushed red pepper
1 medium white onion, finely chopped
3 cloves garlic, finely chopped
1- 1.5 pounds skinless boneless chicken breast, cut into large pieces
1 T olive oil
juice of 2 limes
1/2 cup queso fresco (or another salty, crumbly cheese such as feta)
1/4 teaspoon chili powder
6-8 medium tortillas
salt to taste
1/2 T chopped cilantro
1/4 t chili powder
about 2 avocados

1. Mix sriracha sauce, vinegar, 1/2 t salt, juice of one lime, and crushed red pepper in a large bowl. Add chicken and stir to coat.You can marinade this ahead of time if you have time.
2. Brown chicken in olive oil for about five minutes, then add the chopped onion and garlic on medium heat. Turn heat to medium low until chicken cooks through. As chicken cooks, break up the chicken into bite-sized pieces.
3. As chicken is cooking, cut the corn off the cob.
4. Once chicken is cooked through, add remaining lime juice, corn, chili powder and salt to taste. Cook all for 3-5 minutes, until corn is tender but not mushy. Remove from heat.

Pickled Radishes
1 C chopped radishes
1/4 C water
1/2 C red wine vinegar
1/2 t salt
1/2 t sugar

Mix all ingredients in a glass jar or bowl, and refrigerate until ready to use. Once ready to eat, drain extra liquid from radishes.

Assembling tacos: Put chicken/corn mixture in tortilla, and add pickled radishes, chopped avocado, chopped cilantro, and queso fresco as desired.

Note on cheese: if you live in DC, check out Best World on Mount Pleasant Street for queso fresco.

Saturday, June 23, 2012

Make your own cold-brewed iced coffee


You might be thinking "an iced coffee recipe? What is there to explain?"

And on the part of the ingredients, you'd be right. Obviously iced coffee is... cold coffee and ice, and whatever else you want to add to it.

But I recently bought a cold press coffee maker, and it has been a definite win-win situation: better iced coffee, one, and also cheaper and more environmentally friendly (compared to buying iced coffee at a coffee shop).

It's hot in DC all summer long, and this week was our first hot, in-the-90's, gross week. At times like this, I end up buying coffee from coffee shops a lot more than during the winter, both because I don't like the iced coffee that I made at home as much, and also because the way I was doing it before (cooling down hot coffee by putting it in the refrigerator) took longer to do every day than buying it somewhere.

Process

I bought the Toddy T2N Cold Brew System for about $35 on Amazon. It's an interesting process to do the first few times: you put what seems like a lot of coffee (12 ounces with several cups of water) into the top chamber, which has a filter and a plug at the base, and let is sit for at least 12 hours at room temperature. After 12 hours, you take the plug out of the bottom of the chamber, and the water filters through into a glass carafe. That part takes a bit of planning ahead, but what is produced is actually a concentrate that you later add water to. You should be able to use the amount from one batch for at least a week, and it keeps for up to two weeks in the refrigerator. (I'm not going to write super specific directions for the process, since it comes with instructions, and if you buy a different brand the process is probably slightly different.)


After that, you have a carafe of the concentrate that you can keep in the refrigerator and make iced coffee all week, which is great. When I made mine, I mixed about 1/3 C of the concentrate with enough ice, water, and milk to fill a large pint-sized glass. I like a lot of milk in it without sugar, but you can add whatever you want to it!

The coffee itself is delicious. I think that iced coffee made from cooled-down hot coffee turns out fairly bitter tasting, and with the cold press it seems to be much smoother tasting.

Cost & Environmental Factors

The first time I did this, I wasn't sure if making iced coffee this way was going to be cost effective, because you use more beans per cup than you would for hot coffee. But after seeing how many cups you can get out of the concentrate, and shopping around for some cheaper coffee, I think that the cost is actually really reasonable, especially considering that I think it tastes better. I found a couple of packages of 12-ounce coffee for five to seven dollars that was still pretty good quality, and got around seven servings out the concentrate that that produced. (I didn't include the cost of the cold press in the calculation, but you can see how it would be pretty quickly recovered.)

Cost: About $4

Cost: $0.70 to $1.00 (plus milk/sugar if added)

Lastly, there is an environmental reason to make your own iced coffee: if you've been buying your iced coffee from a coffee shop, you have to throw away the cup after each one. By making it yourself, you're skipping out on the waste that comes from the cup! You can even find a travel re-useable iced coffee glass with a straw at a lot of places - I bought the one in the picture at the top of the post at Target last summer. As I wrote about in a previous post, avoiding using food packing as much as possible has multiple environmental advantages.


Saturday, September 3, 2011

Roasted Tomato - Jalapeno Salsa

July/August Theme: Homemade summer

Well, Readers, summer, and "homemade summer" here on the blog, are both coming to an end. I've tried to come up with some creative ideas for food items to make yourself over these last two months.

And while I think all of them turned out to be really interesting and are recipes that I'll continue to use, I will say this: if you decide based on this series to start making only one thing from scratch, I think it should be salsa. Because aside from all of the environmental reasons for cooking from scratch previously discussed, homemade salsa is just so much better tasting than store-bought salsa. I feel like the two should not even really be in the same category.


When I make my own salsa, I usually make a really simple tomato, onion, and cilantro salsa, but I decided to try and do something more ambitious. This recipe has pretty much the same basic ingredients, but you roast the tomatoes, garlic, and jalapenos before blending them in a food processor. This brought up a couple of new techniques for me: broiling tomatoes in the oven to roast them, and roasting unpeeled garlic along with jalapenos until they are blackened.

The result?

The roasted flavor is really good - it adds a lot of complexity to the flavor of the salsa - and I am also now questioning whether or not there is that much that smells better than garlic being roasted over a flame in its papery skin. So you don't want to miss that.


I made a double batch of this and after five days or so of eating it, mixed it with two avocados (so one avocado per recipe as below) to make a pretty amazing guacamole.

Lastly, I forgot to commemorate this at the time, but the blog was one year old as of July! The first post also happened to be a do-it-yourself recipe just like this one: homemade honey-mustard-ginger vinaigrette salad dressing.


Roasted Tomato-Jalapeno Salsa
From Rick Bayless's Mexican Kitchen: Capturing the Vibrant Flavor of a World-Class Cuisine 

Makes about 2 cups

1 pound (2 medium - large round or 6-8 plum) red, ripe tomatoes
2 large fresh jalapeno chiles
3 garlic cloves, unpeeled
salt, about 1/2 t
1/2 small or 1/3 medium white onion, finely chopped
1/3 C loosely packed chopped cilantro
1 1/2 t apple cider vinegar
juice of 1/2 lime

1. Cut the tomatoes in half, and lay on a baking sheet and place about 4 inches below a very hot broiler. Roast until blistered and blacked on one side, about 6 minutes; with a pair of tongs, flip the tomatoes and roast on the other side, about another 6 minutes.
2. While the tomatoes are roasting, roast the chiles and unpeeled garlic directly on an ungreased griddle or heavy skillet over medium heat. Turn occasionally until both chiles and garlic are blackened in spots and soft, 5-10 minutes for the chiles, and about 15 minutes for the garlic (remove the chiles from the pan once they are done). Cool, pull the stem off the chiles, and peel the papery skins from the garlic.
3. Once tomatoes are done: cool them, then peel the skins off, collecting any juices with the tomatoes.
4. In a food processor, grind the chiles (including seeds), garlic, and 1/4 teaspoon of the salt to a course paste, stopping to scrape down the sides of the bowl a couple of times. Add the tomatoes and pulse a few times until you have a course-textured puree. Transfer the salsa to a serving bowl, and stir in any reserved tomato juices.
5. Stir the finely chopped onion into the salsa, as well as the vinegar, other 1/4 teaspoon of salt, cilantro, and lime juice.

The salsa comes into its own a few hours after it's finished. Keeps in the refrigerator for at least a week.

Sunday, August 21, 2011

Jerk Chicken Marinade

July/August Theme: Homemade summer

The humidity and temperature both dropped in DC today, which, while completely welcome and meant the weather was gorgeous, also served as a reminder that summer is winding down. Which is a little sad. But if you are feeling at all similarly, I think this recipe could help-- grilled and tropical-tasting jerk chicken.


I've been meaning to make this for a few weeks and finally made it last night, and it was really good. I wanted to find an interesting marinade recipe to go along with the made-from-scratch theme. To be honest, it does take a little while to cut up all of the ingredients that make it up, but I think you can really tell the difference, in addition to all of the benefits of making something form scratch rather than buying processed/packaged marinade. The flavors are really interesting-- soy sauce, with all spice and nutmeg, thyme and lime juice. I'm mostly focusing on the marinade aspect (versus the chicken cooking), since you could use this with either grilled or baked chicken.


Since I am currently grill-less, I used a grill pan to grill the chicken. I only marinaded the chicken this for an hour since that was all I had time for, but the recipe actually says that you could marinade chicken with this for up to 12 hours, which could be interesting.


And lastly, a few photos from my summer vacation- this recipe would have tasted even better sitting out in one of these places...


Jerk Chicken Marinade
From Gourmet

3 scallions, chopped
4 large garlic cloves, chopped
1 small onion, chopped
4-5 jalapeno chiles
1/4 c fresh lime juice
2 T soy sauce
3 T olive oil
1 1/2 t salt
1 T packed brown sugar
1 T loosely packed fresh thyme leaves
2 t ground allspice
2 t freshly ground black pepper
3/4 t ground nutmeg
1/2 t ground cinnamon

Combine all ingredients in a blender and blend until smooth. Marinade chicken for at least one hour, but can also be used to marinade chicken over night, up to 12 hours, before cooking.


Wednesday, July 27, 2011

Pasta Salad with Homemade Caramelized Leek & Goat Cheese Dressing

July/August Theme: Homemade summer

Since July is almost over, and really, in DC July and August tend to blend together into one hazy heat-filled period of time, I'm going to combine July and August's theme into one. True to form, it has indeed been heat-filled here lately, which is when I start to fixate on dishes that are served cold, a favorite being pasta salad.


The classic versions I think of are made with either mayonnaise or Italian dressing along with cubes of cheddar cheese and broccoli. Usually, when I make pasta salad, I go in a completely different direction from those. But I thought that it would be interesting to try to make something in the spirit of those pasta salads, but with a homemade dressing made of more unique ingredients and sans mayonnaise.

The cool thing about this recipe is that I started with the base of the dressing with the pasta, and then added in the other elements somewhat experimentally based on what I had. So you could do a lot of different things with it if you changed which vegetables/fruit/protein you added to it. Other ideas I had included asparagus, zucchini, and almonds.

The dressing might sound complicated, but is very easy as long as you are willing to caramelize the leeks. The flavor that comes out is very interesting and somewhat rich, which then plays off of the vegetables, etc well.


Working on this dressing got be thinking about other summer staples that are often store-bought, but that are easy to make from scratch- salsa and meat marinade in particular came to mind. So the theme for July and August will be summer recipes that you might usually use a store-bought ingredient (in this case, the dressing for the pasta salad) with an easy homemade version. I'll also be doing a post about the topic of homemade versus processed food products in general, looking at some of the advantages to making things yourself instead of buying them. Happy summer!


Pasta Salad with Homemade Caramelized Leek & Goat Cheese Dressing

Makes a large batch, so consider halving if only want a few servings

1 T olive oil
touch of salt
6-7 radishes, sliced very thin
1 bunch broccolini or broccoli(about 2 C chopped)
4 C dry pasta, such as macaroni
1 15-ounce can chick peas
2 medium Granny Smith apples

Dressing
Juice of one lemon
1 t salt
1/2 t ground black pepper
3 T olive oil
1.5 T apple cider vinegar
1/2 T honey
4 ounces goat cheese, softened
2 medium to large leeks (about 2 C chopped), caramelized

1. Remove dark green tops and root from bottom of leeks. To wash, halve leeks lengthwise and thinly slice crosswise in large bowl of cold water. Wash leeks well and lift from water into large colander.
2. Heat 1 T of olive oil in large frying pan over medium heat, add leeks and stir to coat. Sprinkle with salt.
3. Turn to low and cook for 20-30 minutes until brown and caramelized.
4. In meantime, boil large pot of water, about 4 quarts with salt added. When water is boiling, add pasta. Cook until al dente, about 8-10 minutes.
5. Slice radishes into very thin slices. Chop apples into small cubes.
7. Once leeks are done, chop brocollini or broccoli into small pieces, and saute lightly in same pan as leeks were cooked in. Cook only until lightly sauteed but still crisp.
8. Set pasta, fruit and vegetables aside.
9. To make dressing, combine caramelized leeks, lemon juice, salt, pepper, olive oil, vinegar, honey, and softened goat cheese in food processor, and combine until ingredients are finely ground.
10. Combine dressing with pasta. Once pasta is room temperature, come both with fruit, vegetables and chick peas. Put in refrigerator until cold. Serve chilled.

Sunday, September 12, 2010

Latin Corn Soup

I could wax a little poetic about good relish-dish combinations. Partly because it’s more interesting when you actively combine things as you eat, but I think that relishes must also be important food-chemistry wise in adding that extra “je ne sais quoi” element to an already good dish, therefore making it even better.

This soup recipe is a good example; the soup itself mixes some already interesting flavors: oregano, coconut milk, and radishes, but the avocado-based relish (which is basically guacamole) makes this soup really satisfying. This is also a great end-of-summer soup, because it can be eaten either hot or cold. It’s good both ways, but it’s really refreshing cold.


Latin Corn Soup

Adapted from a Moosewood Restaurant Cookbook recipe

Makes about nine cups

For soup:

2 C thinly sliced onions
1 T olive oil
3 garlic cloves, minced
1 fresh jalapeño, minced
2 t ground coriander
1 ½ t dried oregano
1 t salt
2 C water or vegetable broth
¼ C sliced radishes
2 C peeled and diced sweet potatoes
1 C diced yellow or orange bell peppers
1 14-ounce can coconut milk
1 14-ounce can diced tomatoes
1 ½ C fresh or frozen corn kernels
2 T chopped fresh cilantro
2 T fresh lime juice

For relish:

1 ½ T fresh lime juice
2 ripe avocados
½ T salt
1 tomato, chopped
1 ½ T minced red onion

1. In soup pot on medium heat, cook the onions in the olive oil for about 5-10 minutes, until they are softened. Add the garlic, jalapeño, coriander, oregano, and salt, and stir for 3-5 minutes. Stir in one cup of the water/broth and the radishes, sweet potatoes, and bell peppers. Cover and simmer, stirring occasionally, until the vegetables are tender, about 10 minutes.

2. While the vegetables simmer, prepare the relish. Peel, chop, and mash the avocados, and then add the lime juice, salt, tomato and red onion.

3. Once the vegetables are tender in the soup, add the coconut milk, diced tomatoes, and corn, and bring back to a simmer. After simmering for five minutes, add the lime juice.

4. To serve, garnish each serving with the chopped cilantro and a spoonful of the avocado relish.

Can be served either hot or cold.

Saturday, September 4, 2010

Corn & Avocado Potato Salad

Even though it's September, it still feels very much like summer here in DC.

So in the interest in soaking up the last bits of summer, I'm going to post some of my favorite summer recipes while I still can!


(This is Minnesota, but suggests my state of mind...)

So it was hot here, and I was thinking about shish kabobs. And how much I love them. I think it's because they combine a lot of fresh elements together into one dish (I like them made with chicken, tomatoes, potatoes, and peppers). And then I thought about how you could mix a lot of those things into a dish without grilling them, and eat it cold. Perfect for a sweltering humid DC night. Below is what I came up with, with some added elements... and it was delicious.

But I can't take too much credit for this, since since I started making it I've noticed that there are actually a lot of "alternative potato salad" recipes out there similar to this one. I think that just goes to show, though, that other people like mayo-free potato salad... and the enduring deliciousness of potatoes with avocados.

I made a vegetarian (and vegan) version of this recipe, but you could very easily make a meat version, and increase the similarity to an actual shish kabob, by adding sliced and satueed chicken breast; you could even make a bit more of the dressing to marinate the chicken in.


Corn & Avocado Potato Salad

Sesame-Lime dressing (recipe below)
1 T olive oil
10-12 red potatoes
Corn sliced from two cobs of corn (or 1.5-2 C frozen corn)
2 C grape tomatoes
1/2 C chopped shallots
2 yellow or orange bell peppers
2 avocados
Optional: sliced sauteed chicken breast

Sesame-Lime Dressing

1/2 C olive oil
1/4 C rice wine vinegar
1 T sesame oil
1/2 t salt
1/4 t pepper
juice of one lime
1 t ground coriander
1 t garlic powder
2 t garlic powder

First, boil the potatoes in salted water until they are just tender but al dente (leave skins on). This should take about 15-20 minutes.

While the potatoes are boiling, prepare the dressing and set aside.

Chop the peppers and shallots, and slice the corn from the raw (not boiled) corn cobs.

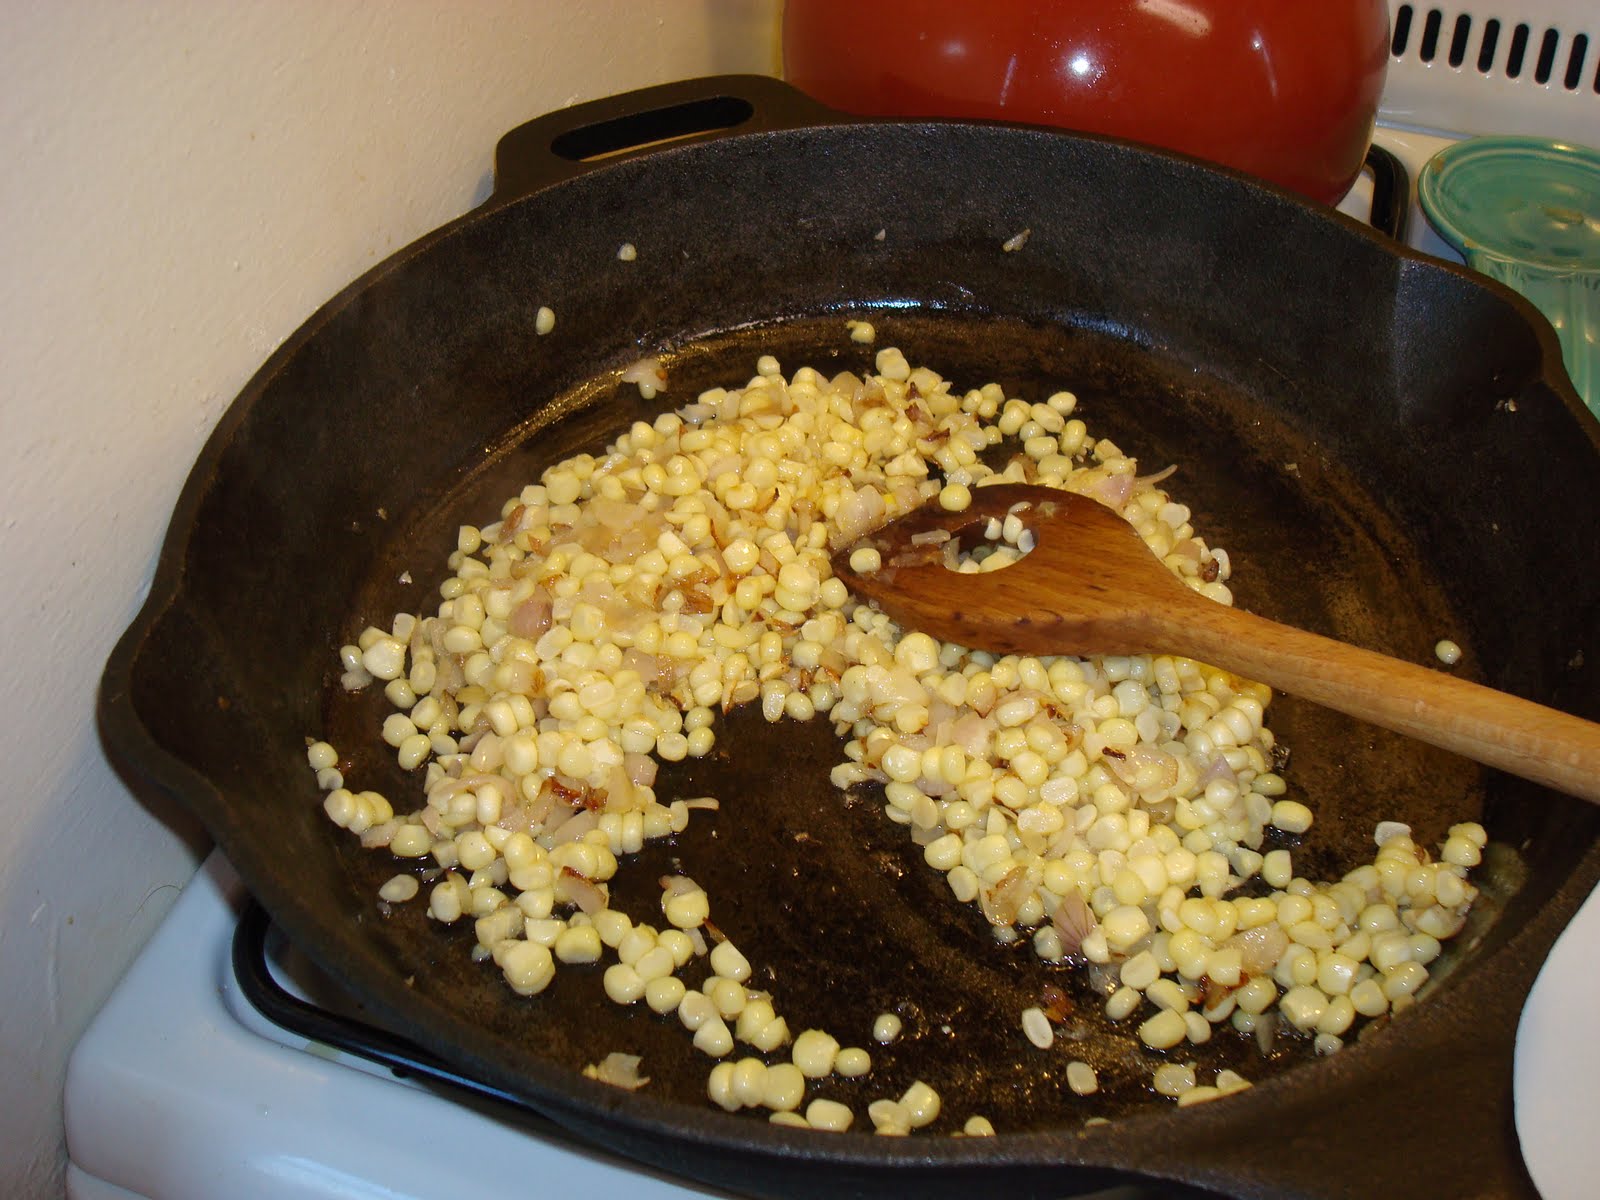
In a large saute pan, saute the shallots in the olive oil for about five minutes, and then add the corn. Saute for about five more minutes, and then add the peppers and saute for about another five minutes. The vegetables should have softened, but still have some crispness.


Chop the avocado into medium chucks and set aside.

Once the potatoes are ready, drain them and slice them in half. In a large bowl, combine the potatoes and shallots, peppers, and corn. Add the dressing, and then the tomatoes. Finally, add the avocado, and mix all together with salad tongs.

Put salad in refrigerator until room temperature or cold, depending on preference.

Keeps for several days in the refrigerator and tastes great cold!